Six Tips To Mastering Mouth-Watering Imagery
4 Min Read By Oksana Pali
Food photography has become a worldwide phenomenon. But through the unimaginable twists and turns of 2020, proper imagery has become a restaurateur’s saving grace. In the face of COVID-19’s many restrictions—supply chain disruptions, economic uncertainty, and lack of in-person activity—the dining industry has lost its best marketing pathways. No longer can we walk by the open doors of a bakery, or be enticed by the clamor of a crowded diner known for its quality food.
But we can (and more than ever, we do) scroll through social media, check our email, and try to support our favorite local businesses in any virtual way possible. For any owner in the industry, a photo just became worth much more than a thousand words.
Taking your food photography to the next level means taking charge of your COVID-19 recovery. Budgets are thin, but it doesn’t take expensive gear or professional lighting to capture great images that tell great stories. All you need is basic lighting knowledge, a couple of well-picked props, and some practice.
Capture your favorite meals, promote your brand, and keep your customers close through the strange COVID-19 days—the basic skills outlined below will help you take food photography that wins.
Light the Way
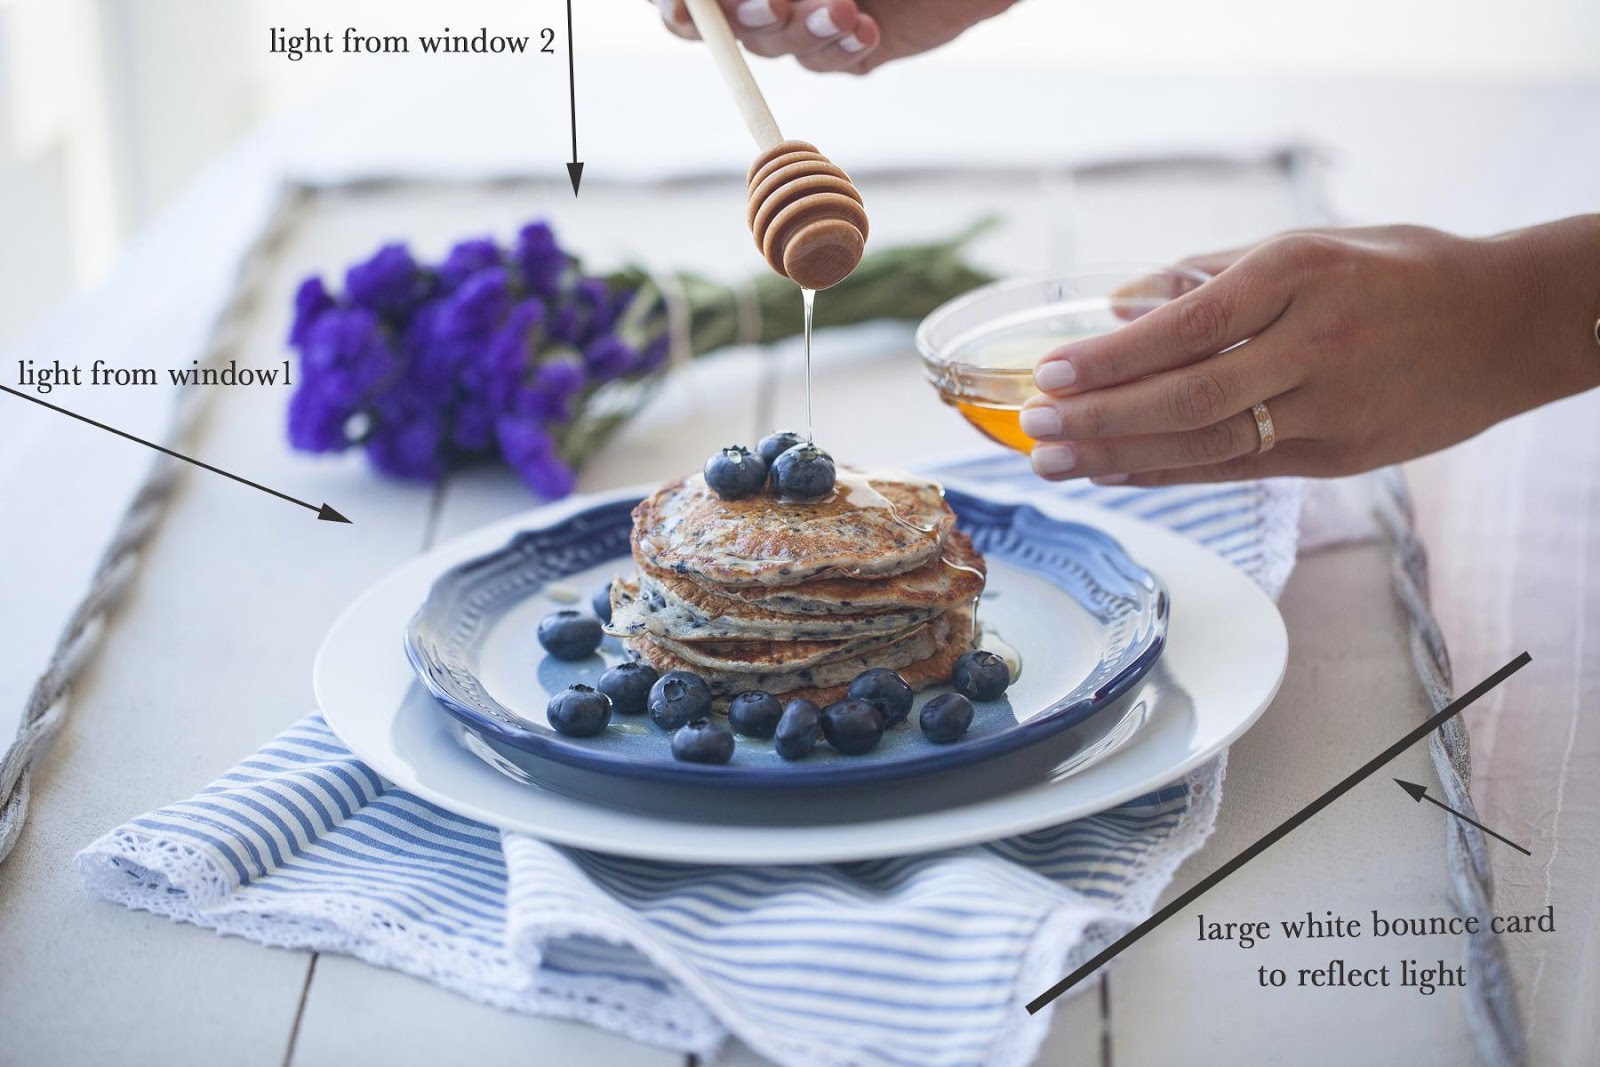
Mastering light is perhaps the single most important step you can take to improve your photography. When photographing food, natural lighting is ideal, but you must know how to use it to your advantage. Set up a table by a north-facing window or use sheers to diffuse intense lighting. In this photo of pancakes, I placed them next to two windows, one on the left and one behind. Since there was a harsh glare I softened it with sheer curtains. However, this left me with intense shadowing, so I used a reflector to fill in being careful not to over brighten the shadows. You can buy a real reflector but white cardboard also does the trick.
Prop It Up
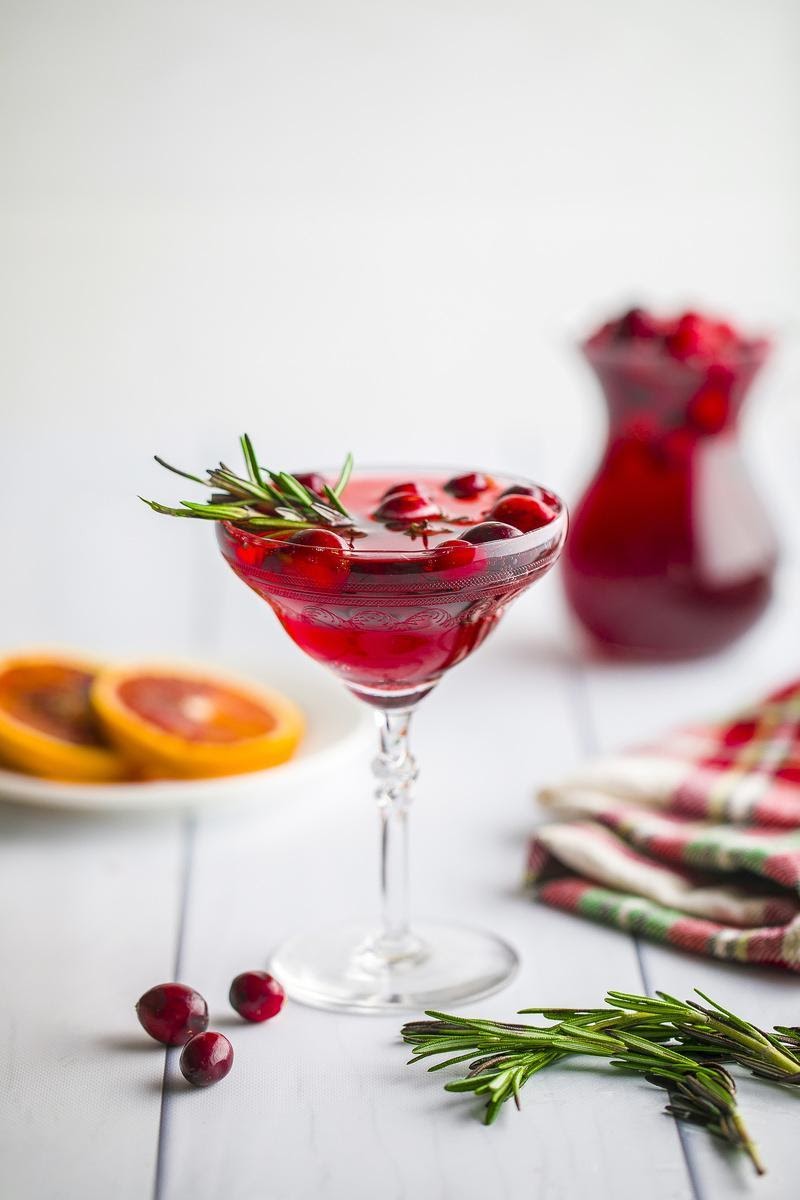
When choosing props, consider the subject first. What can bring life and interest to the scene? This image was shot for the holiday season. Without the extra props the red liquid would have been dull, so I styled it with an interesting table top, Christmas linens, rosemary, cranberries and other tableware. I set the scene with the pitcher in the background and the linens to the right.
Try adding only a couple of props at a time feeling it out and shoot as you go. You want the viewer to be drawn in to the photography, not overwhelmed by overcrowding and a million little details.
Perfectly Composed
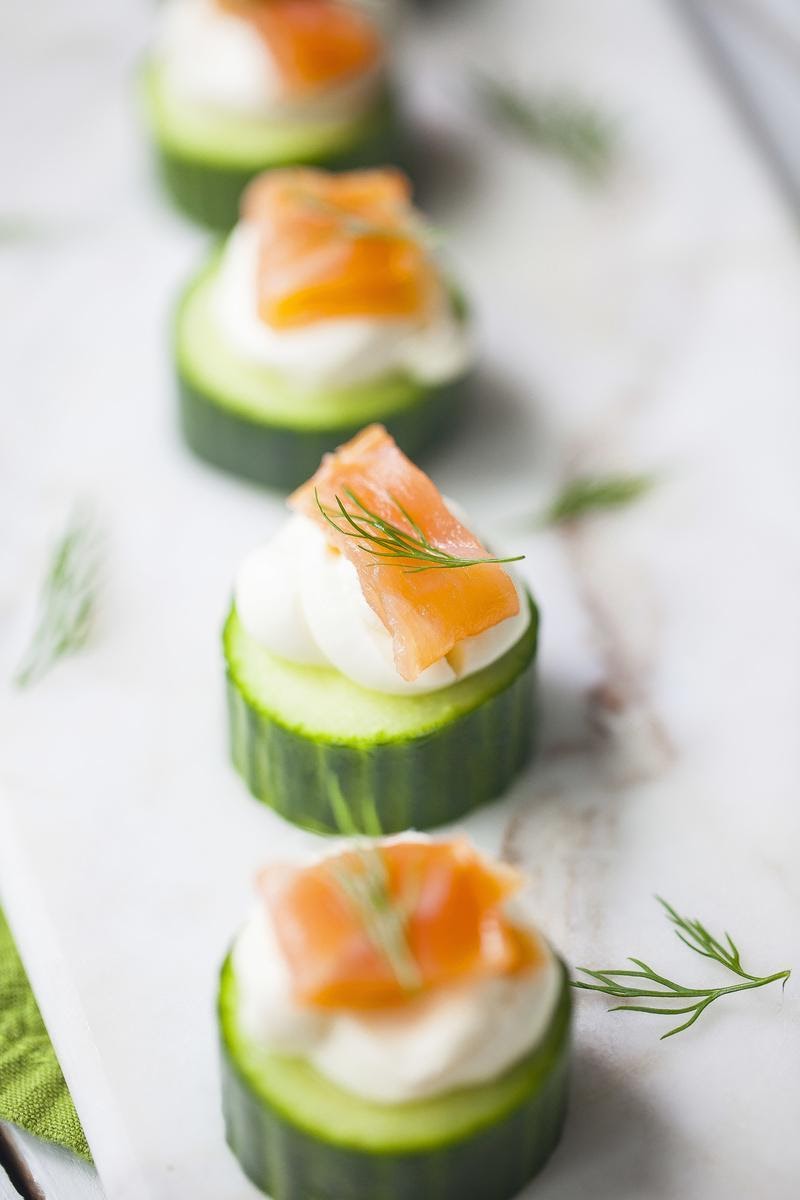
Props add interest, but composition brings dynamics to the photograph. In this simple shot of cucumbers topped with dill, cream cheese and smoked salmon, there are plenty of shapes and lines to make the composition fill the frame without an abundance of props. The slight diagonal here is pleasing to the eye, so always look for how the shapes, diagonals, curves, repeated patterns or lines fill your frames and effect your composition.
Lastly, look for layers in your composition by providing a foreground, middle ground and background, arrange objects accordingly to add depth and creativity.
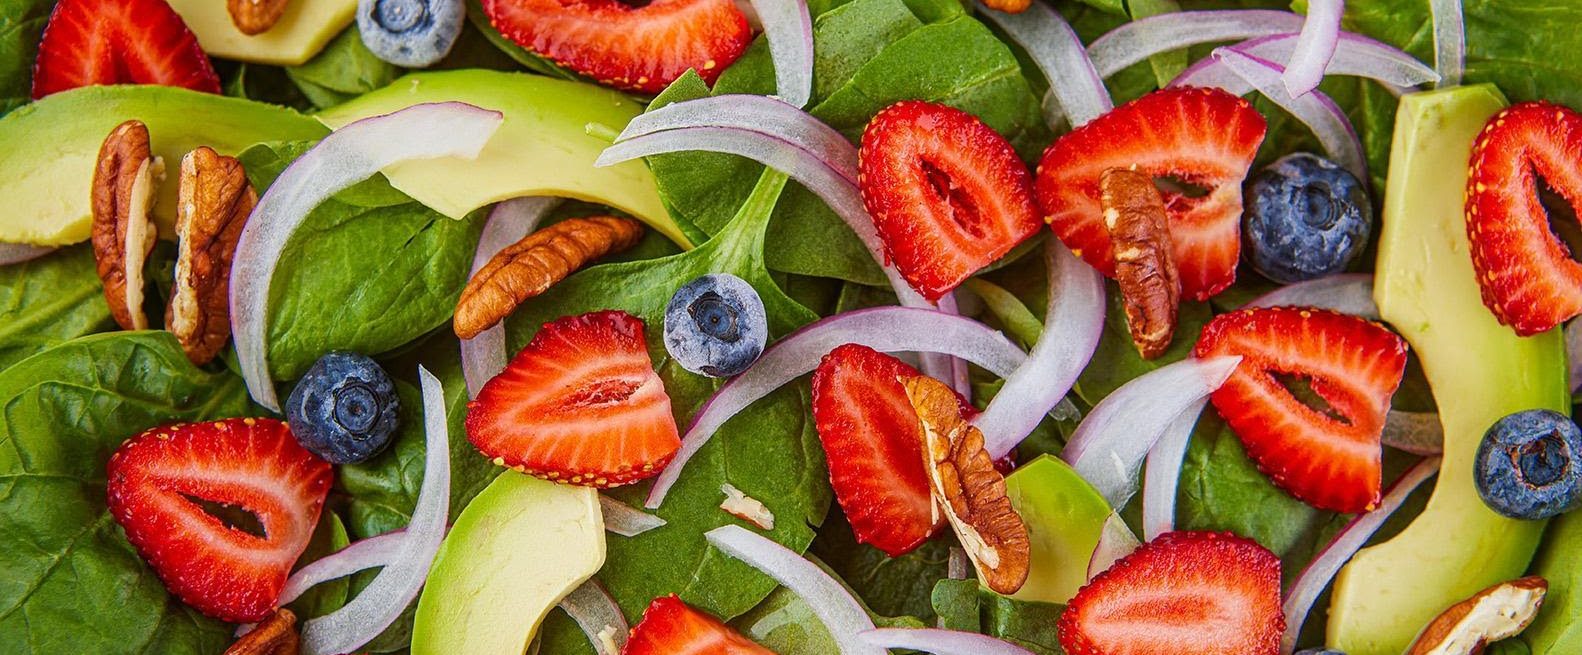
All the Right Angles
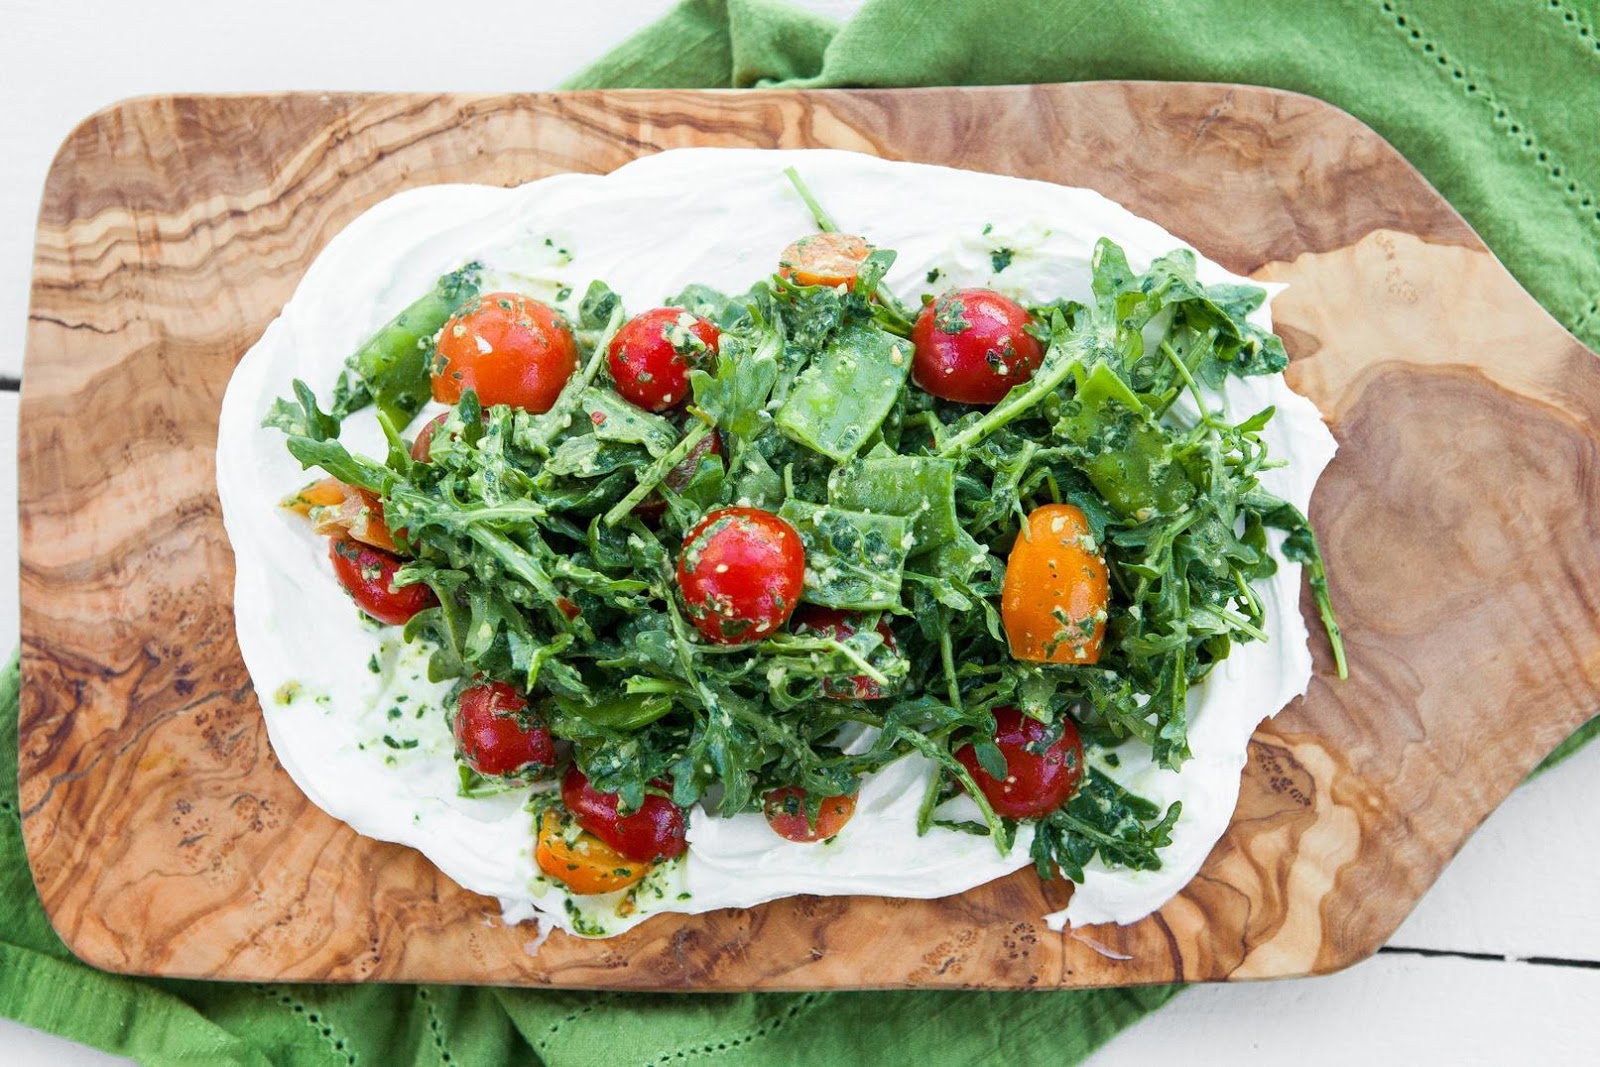
When creating your composition don’t forget the importance of angles. What part of the food is the focal point? This photograph of salad works best from above shot at a 90˚angle looking downwards, because it lacks height. Shooting it from the side wouldn’t have filled the frame, from above it has a graphic quality.
If you are photographing a drink, sandwich or stacked cookies, shoot from a 45˚ angle (level with the table) focusing on the drips or textures. For a camera with manual settings you want a shallow depth of field which means the focal point is sharp and blurred elsewhere, if you are using your smartphone you can achieve this with the portrait option.
Underplay the Prep
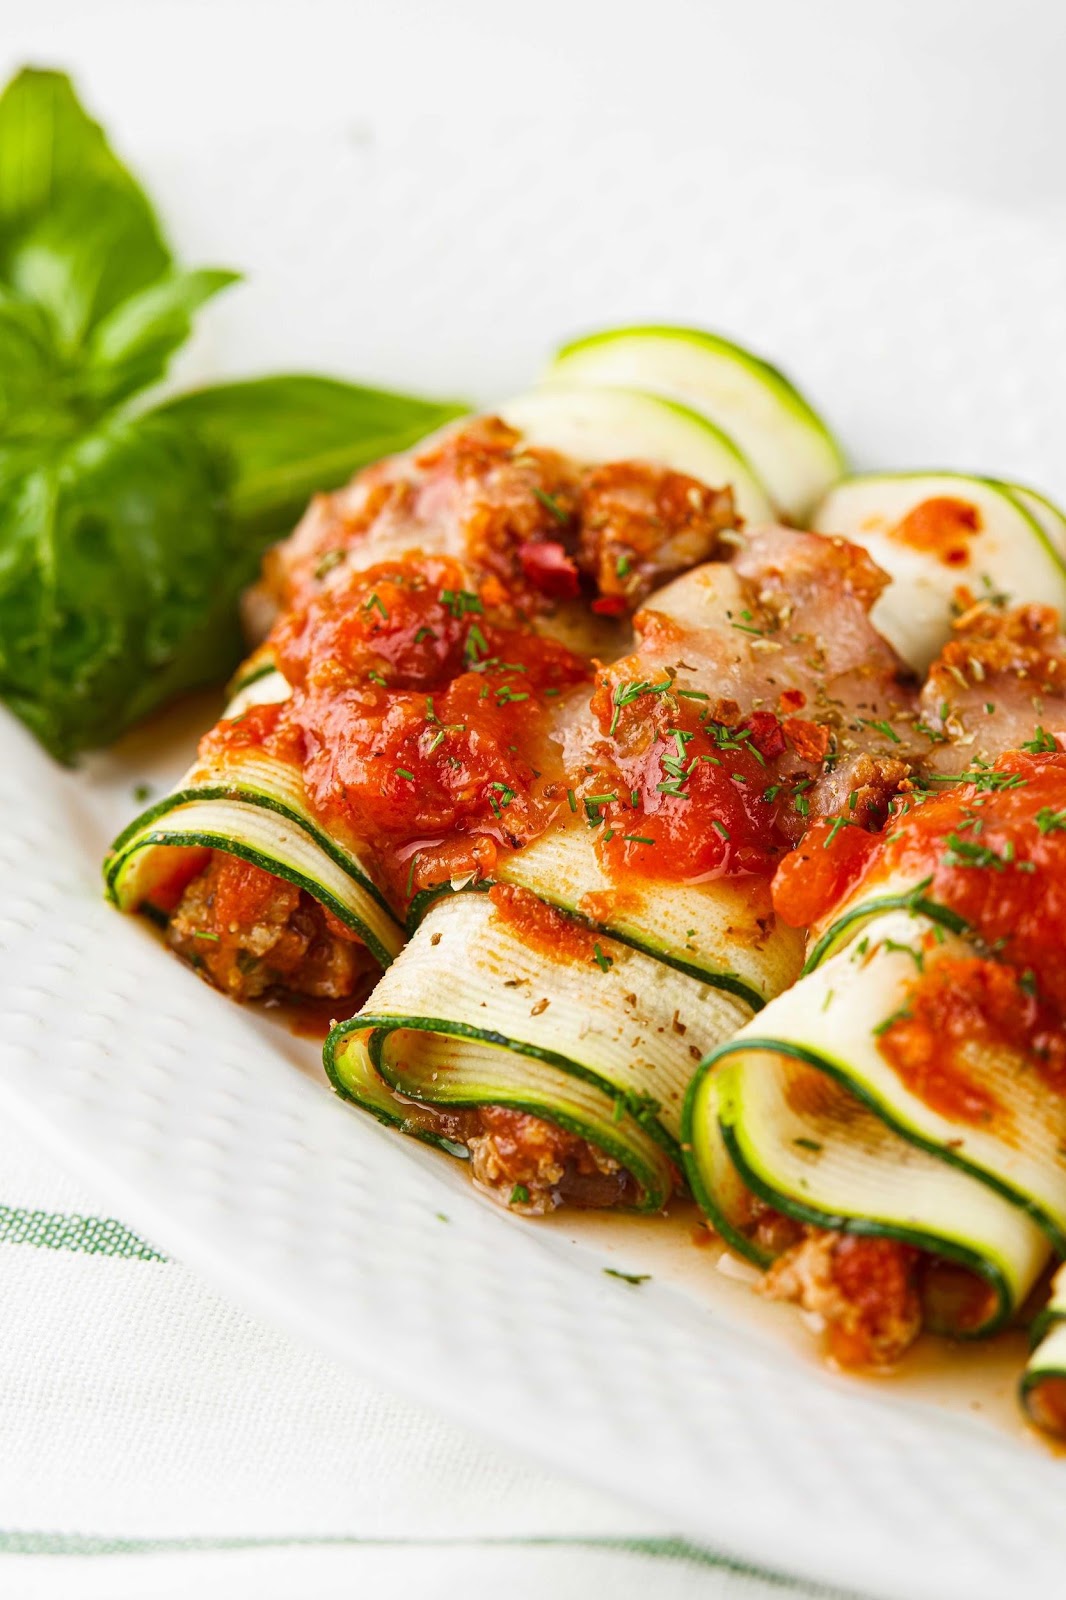
When prepping food for photography, try slightly undercooking it so that you don't lose the fresh colors and textures. For my photograph of the zucchinis, I requested that my client plate them a bit underdone, so they wouldn’t look soggy. Likewise, you can keep a few fresh extra ingredients on hand to brighten up the dish at the moment you start to photograph the dish.
For salads, I find it best to only dress them at the last possible moment to prevent the leaves from getting limp. Try shooting first with no dressing and adding a bit to the dressing as you go, sometimes no dressing allows the freshness to speak for itself.
Edit It
The final stage in food photography is the editing. There are loads of great apps to bring some real zing to your images, such as Snapseed on your phone, or Lightroom or Photoshop on your desktop computer.
Begin by checking your white balance as natural lighting sometimes gives an unwanted blue or green cast. Tweak the brightness if your shot is too dark. Bump up the saturation to make colors more vivid. Play with the sharpness to make food look nice and crisp, but be careful not to sharpen too much as grain and noise may creep in. A little goes a long way; you want to make sure everything looks natural.